Many teeth can have an endodontic procedure but may not be restorable or important to the overall treatment plan. A well-known endodontist used to say “get your head out of the canal!” Develop a treatment plan before committing to endodontic therapy. The case depicted below is an example of a maxillary lateral incisor that was referred for retreatment before a post and crown. The best treatment option was extraction due to the poor restorative prognosis (figures 1 and 2). This case illustrates the need to determine restorability before endodontics.
 |  |
| Figure 1 | Figure 2 |
9. Always have a pulpal and periradicular diagnosis.
This will lead to proper treatment. Remember to make sure that pulp tests confirm radiographic impressions; i.e., a tooth with a large radiolucency will test nonvital if the origin is from the dental pulp. Conversely, if the patient has a chief complaint of lingering pain with cold, there may be little or no change on the periapical radiograph. Endodontic diagnosis is typically straightforward and follows a logical progression. Develop a protocol for diagnostic tests to avoid the unfortunate treatment of the wrong tooth. Documentation of a diagnosis is important for dento-legal issues as well.
8. Take at least two preoperative radiographs from different angles to appreciate multiple roots, canals, and curvature.
Figure 3 (1) is an excellent example of what a tooth with complicated anatomy looks like clinically and from varying angles in the radiograph, respectively. The second set of radiographs (figures 4 and 5) depict how angulation can completely change the view and, arguably, the potential outcome, due to curvature and overlapping (figure 5).
 |
| Figure 3 |
 |  |
| Figure 4 | Figure 5 |
7. Know the typical and potential atypical anatomy for the tooth being treated.
Oftentimes teeth will present with an additional canal and being able to read and interpret the radiographs will ensure canal location and proper treatment of these teeth.
6. Get to know each canal.
Use hand files to appreciate the size and curvature of the canals. Rotary instruments are wonderful, but using small hand files initially will develop a glide path and provide knowledge of the “danger zones.” Converging and diverging canals can be established by this exploratory process (figure 6).
 |
| Figure 6 |
5. Establish a glide path before your rotary instruments.
This helps to avoid instrument separation.
4. Develop an endodontic treatment plan for each canal, and visualize the final result before treatment.
In the case depicted below, the need for a retreat was evident, but a short crown/root ratio with very little remaining tooth structure made an implant a better long-term restorative option (figures 7-9).
 |  |  |
| Figure 7 | Figure 8 | Figure 9 |
3. Always use a rubber dam.
Following proper protocol will ensure your patient’s safety during the procedure (figure 10). Avoid aspiration and canal contamination. Try placing the rubber dam and clamp as one unit.
 |
| Figure 10 |
2. Be careful accessing maxillary first bicuspids.
It is a common tooth perforated due to the mesial concavity!
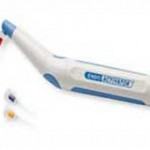
1. Approach each case with a biologic rationale.
Remember that files shape and irrigants clean (figures 11 and 12). They are equally important. Develop an irrigation regimen. Use sodium hypochlorite followed by smear later removal.
 |  |
| Figure 11 | Figure 12 |